TT Artisan Light Meter II - Review
Over the past few years, alongside using digital cameras for my photography like everyone else, I have also been shooting with film cameras. After all, shooting with film is still photography, just a more analogue experience. However, there is one big caveat to shooting with film; more often than not you need a reliable after market light meter. This is quite simply because film cameras, depending upon their age may or may not have had light meters and after many decades, those light meters might not be working any more. Or not reading accurately at all!
That is where a meter like this TT Artisan Light Meter comes in to play.
I have a variety of film cameras I like to use (I have a bad habit of making impulse buys and now have several) and the light meters in some of them just plain don’t work any more. In this instance, the film camera I like use the most is a Pentax Spotmatic SPII. This camera came out in the 1970’s and came with a light meter that was powered by a small mercury cell battery. These small batteries aren’t really available to purchase any more because of the fact they contain mercury. There are alternative zinc based batteries, or a modern button battery can be used, but I have tried these and the light meter refuses to function. Thus I needed an alternative.
The Light Meter Itself
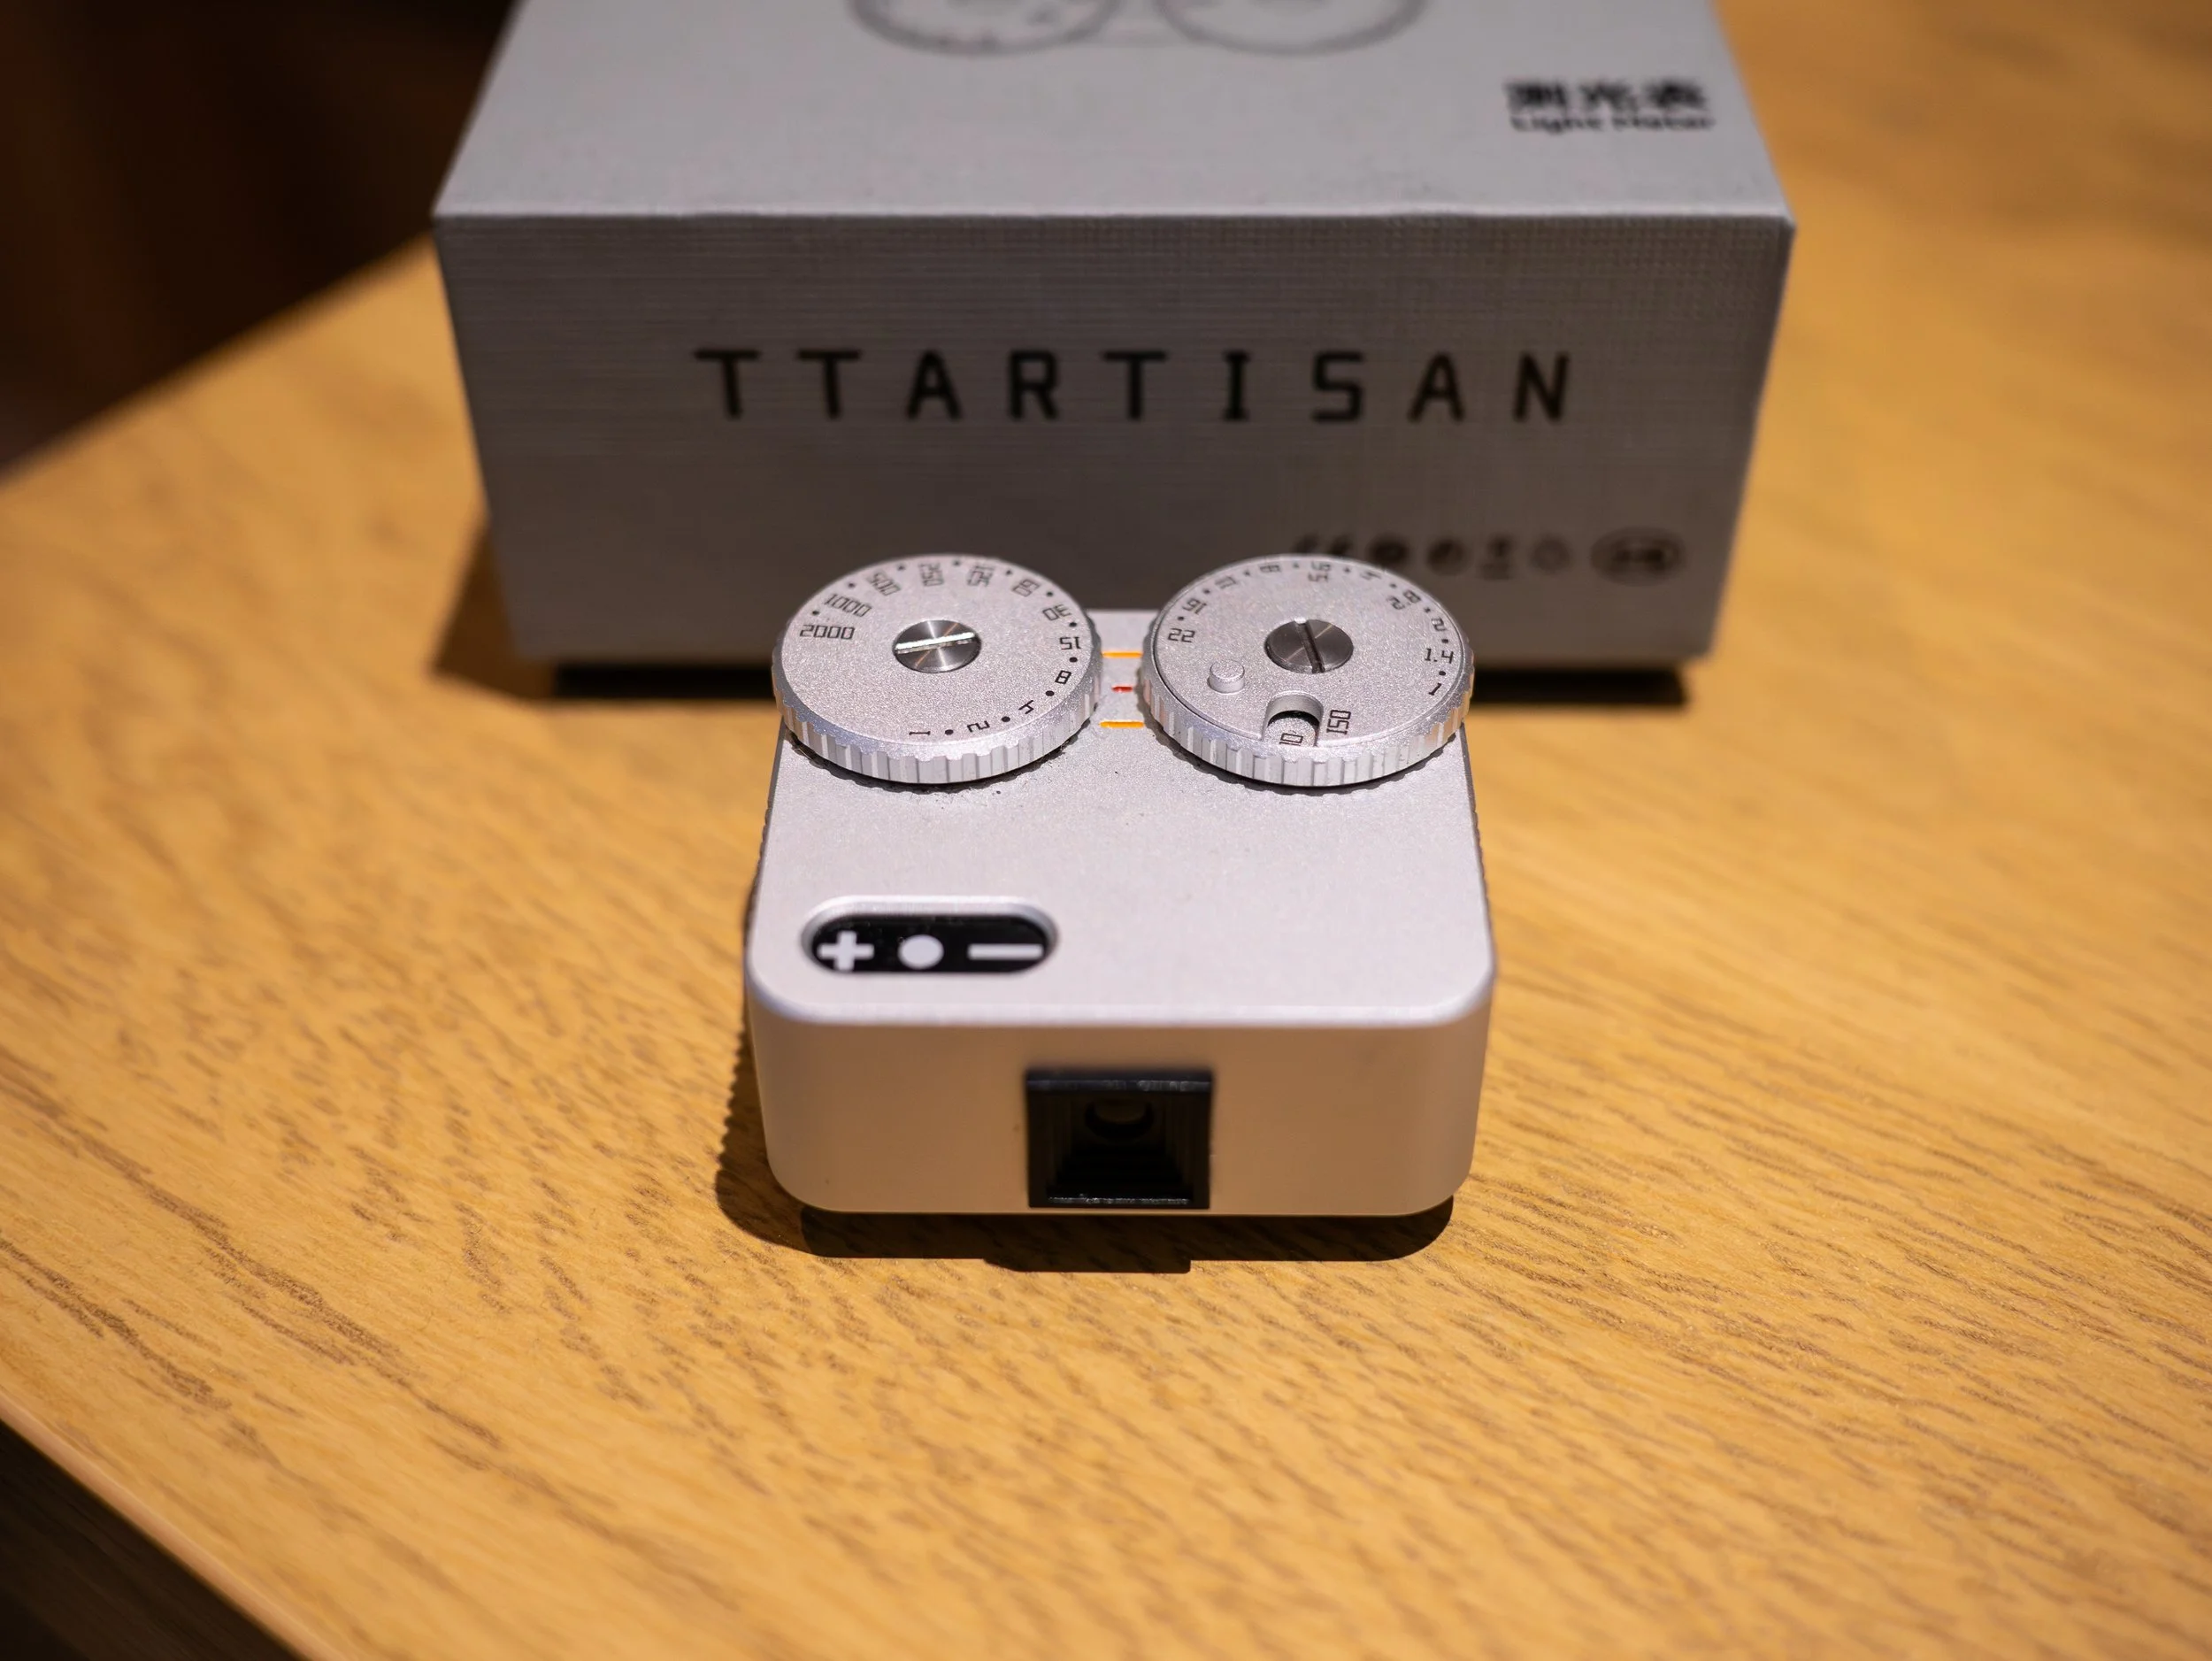
After a bit of research I came across this TT Artisan Light Meter. It’s the mark 2 version of their light meter. I never used the mark 1, so my experiences are only with the mark 2. From what I’ve read the mark 2 is a logical evolution of the light meter which addressed several issues users complained about. These changes included more shutter speeds stops that have click stops compared to the de-clicked older version. The light meter lens has been improved for better accuracy and the mark 2 meter is also slightly smaller than the mark 1 by using a smaller battery (a CR1632 compared to the previous CR2032). It has a cold shoe adapter so you can mount it to your cameras and this cold foot is held in place by 3 small screws. There are multiple drilled holes in the bottom of the light meter and this allows you to adjust the position of the foot to suit either the cold shoe position on the camera or personal tastes. The light meter comes with a small screwdriver to use on these little screws. And they are little, so be sure not to lose them!
The meter itself is nice and easy to use, you literally point it at the subject you wish to photography, press the small button on the rear of the light meter and this will give you a reading. There are three small LED lights on top. They will tell you if the settings you have inputted via the dials are either underexposed (negative light), overexposed (positive light), or correctly exposed (centre light). To select the ISO speed of the film you are using, you have to hold the shutter speed dial steady whilst turning the inner dial with the little knob. The ISO speeds go from 25 to 6400.
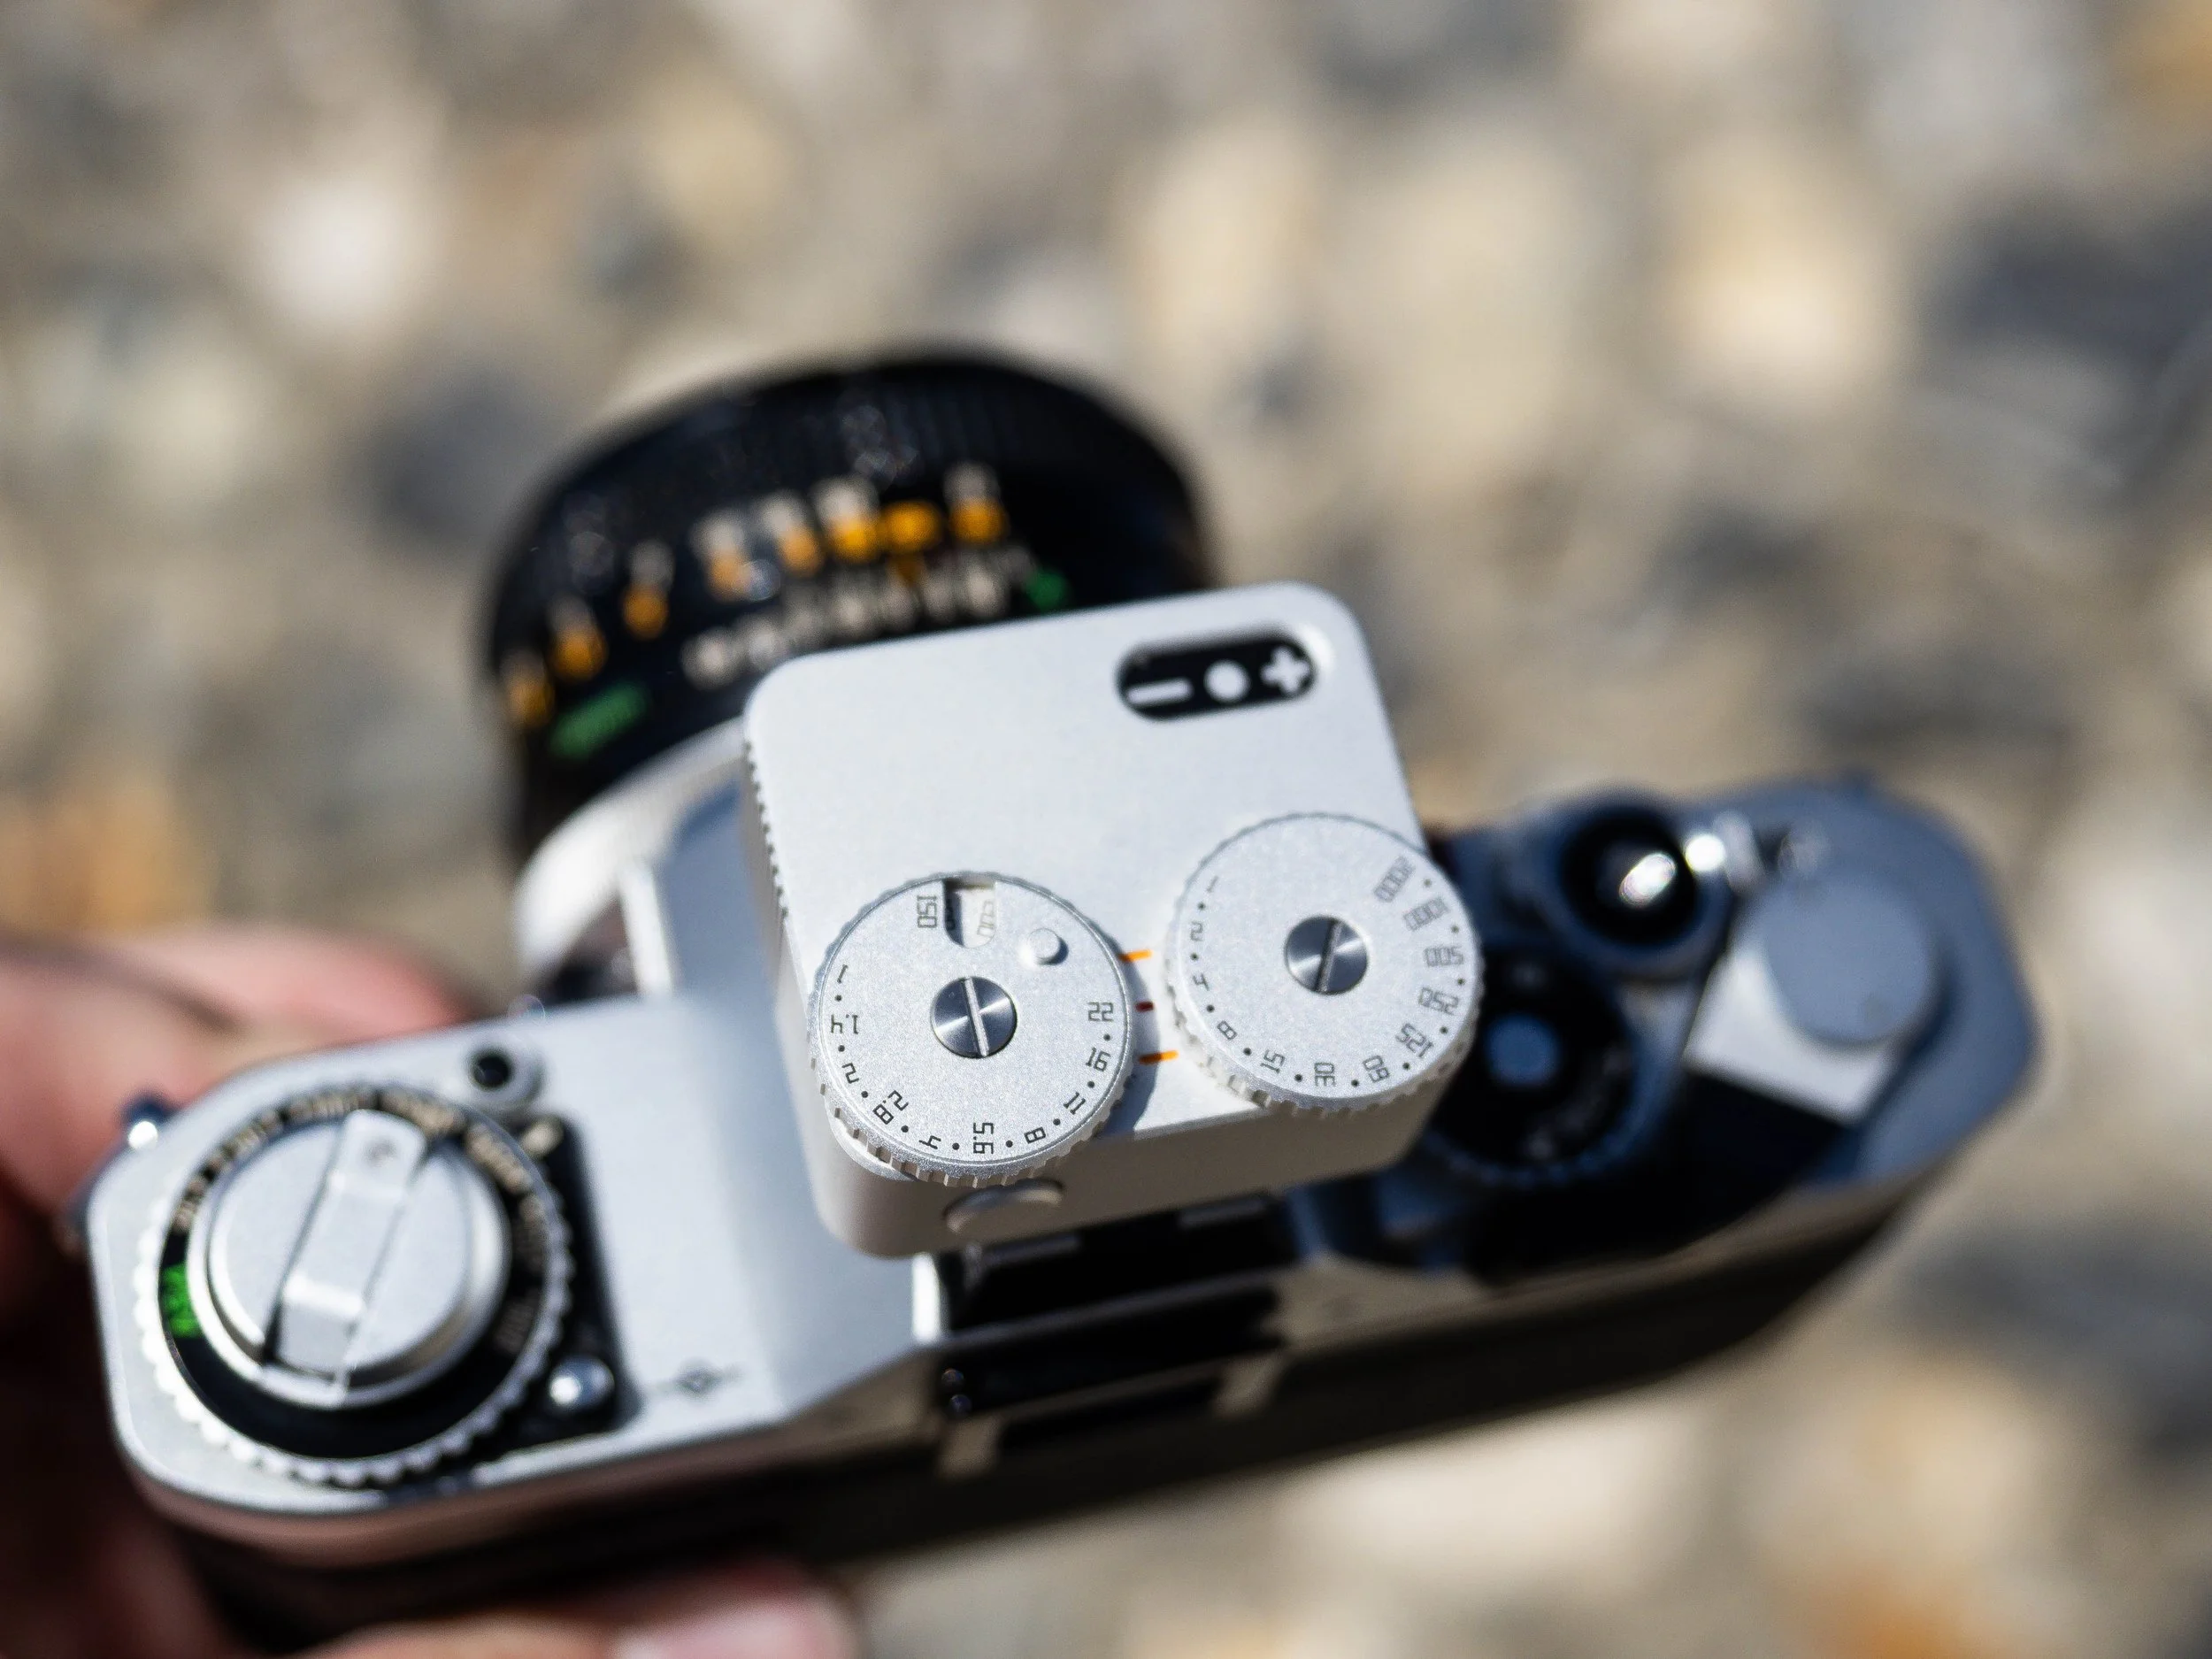
The Light Meter On A Camera Showing The Top Controls And The Back Button. The LED dials are clearly visible with their + and - symbols. Correct exposure is achieved when the centre LED is illuminated.
To achieve the correct exposure, you need to set your ISO dial to the speed you are using, or wish to use, then adjust the aperture and shutter speed dials to attain the correct exposure. This isn’t the quickest system in the world, but it does work well enough. I have found the meter exposes scenes mostly correctly. To me, it feels like it slightly overexposes but only slightly. Certainly not enough to ruin a shot! However, one issue I have found is that the LED lights aren’t bright enough to be seen on sunny days! I regularly had to use the meter handheld where I would expose the scene and, then use my jacket or camera bag to shield the meter from the bright sunlight just so I could read the LEDs!
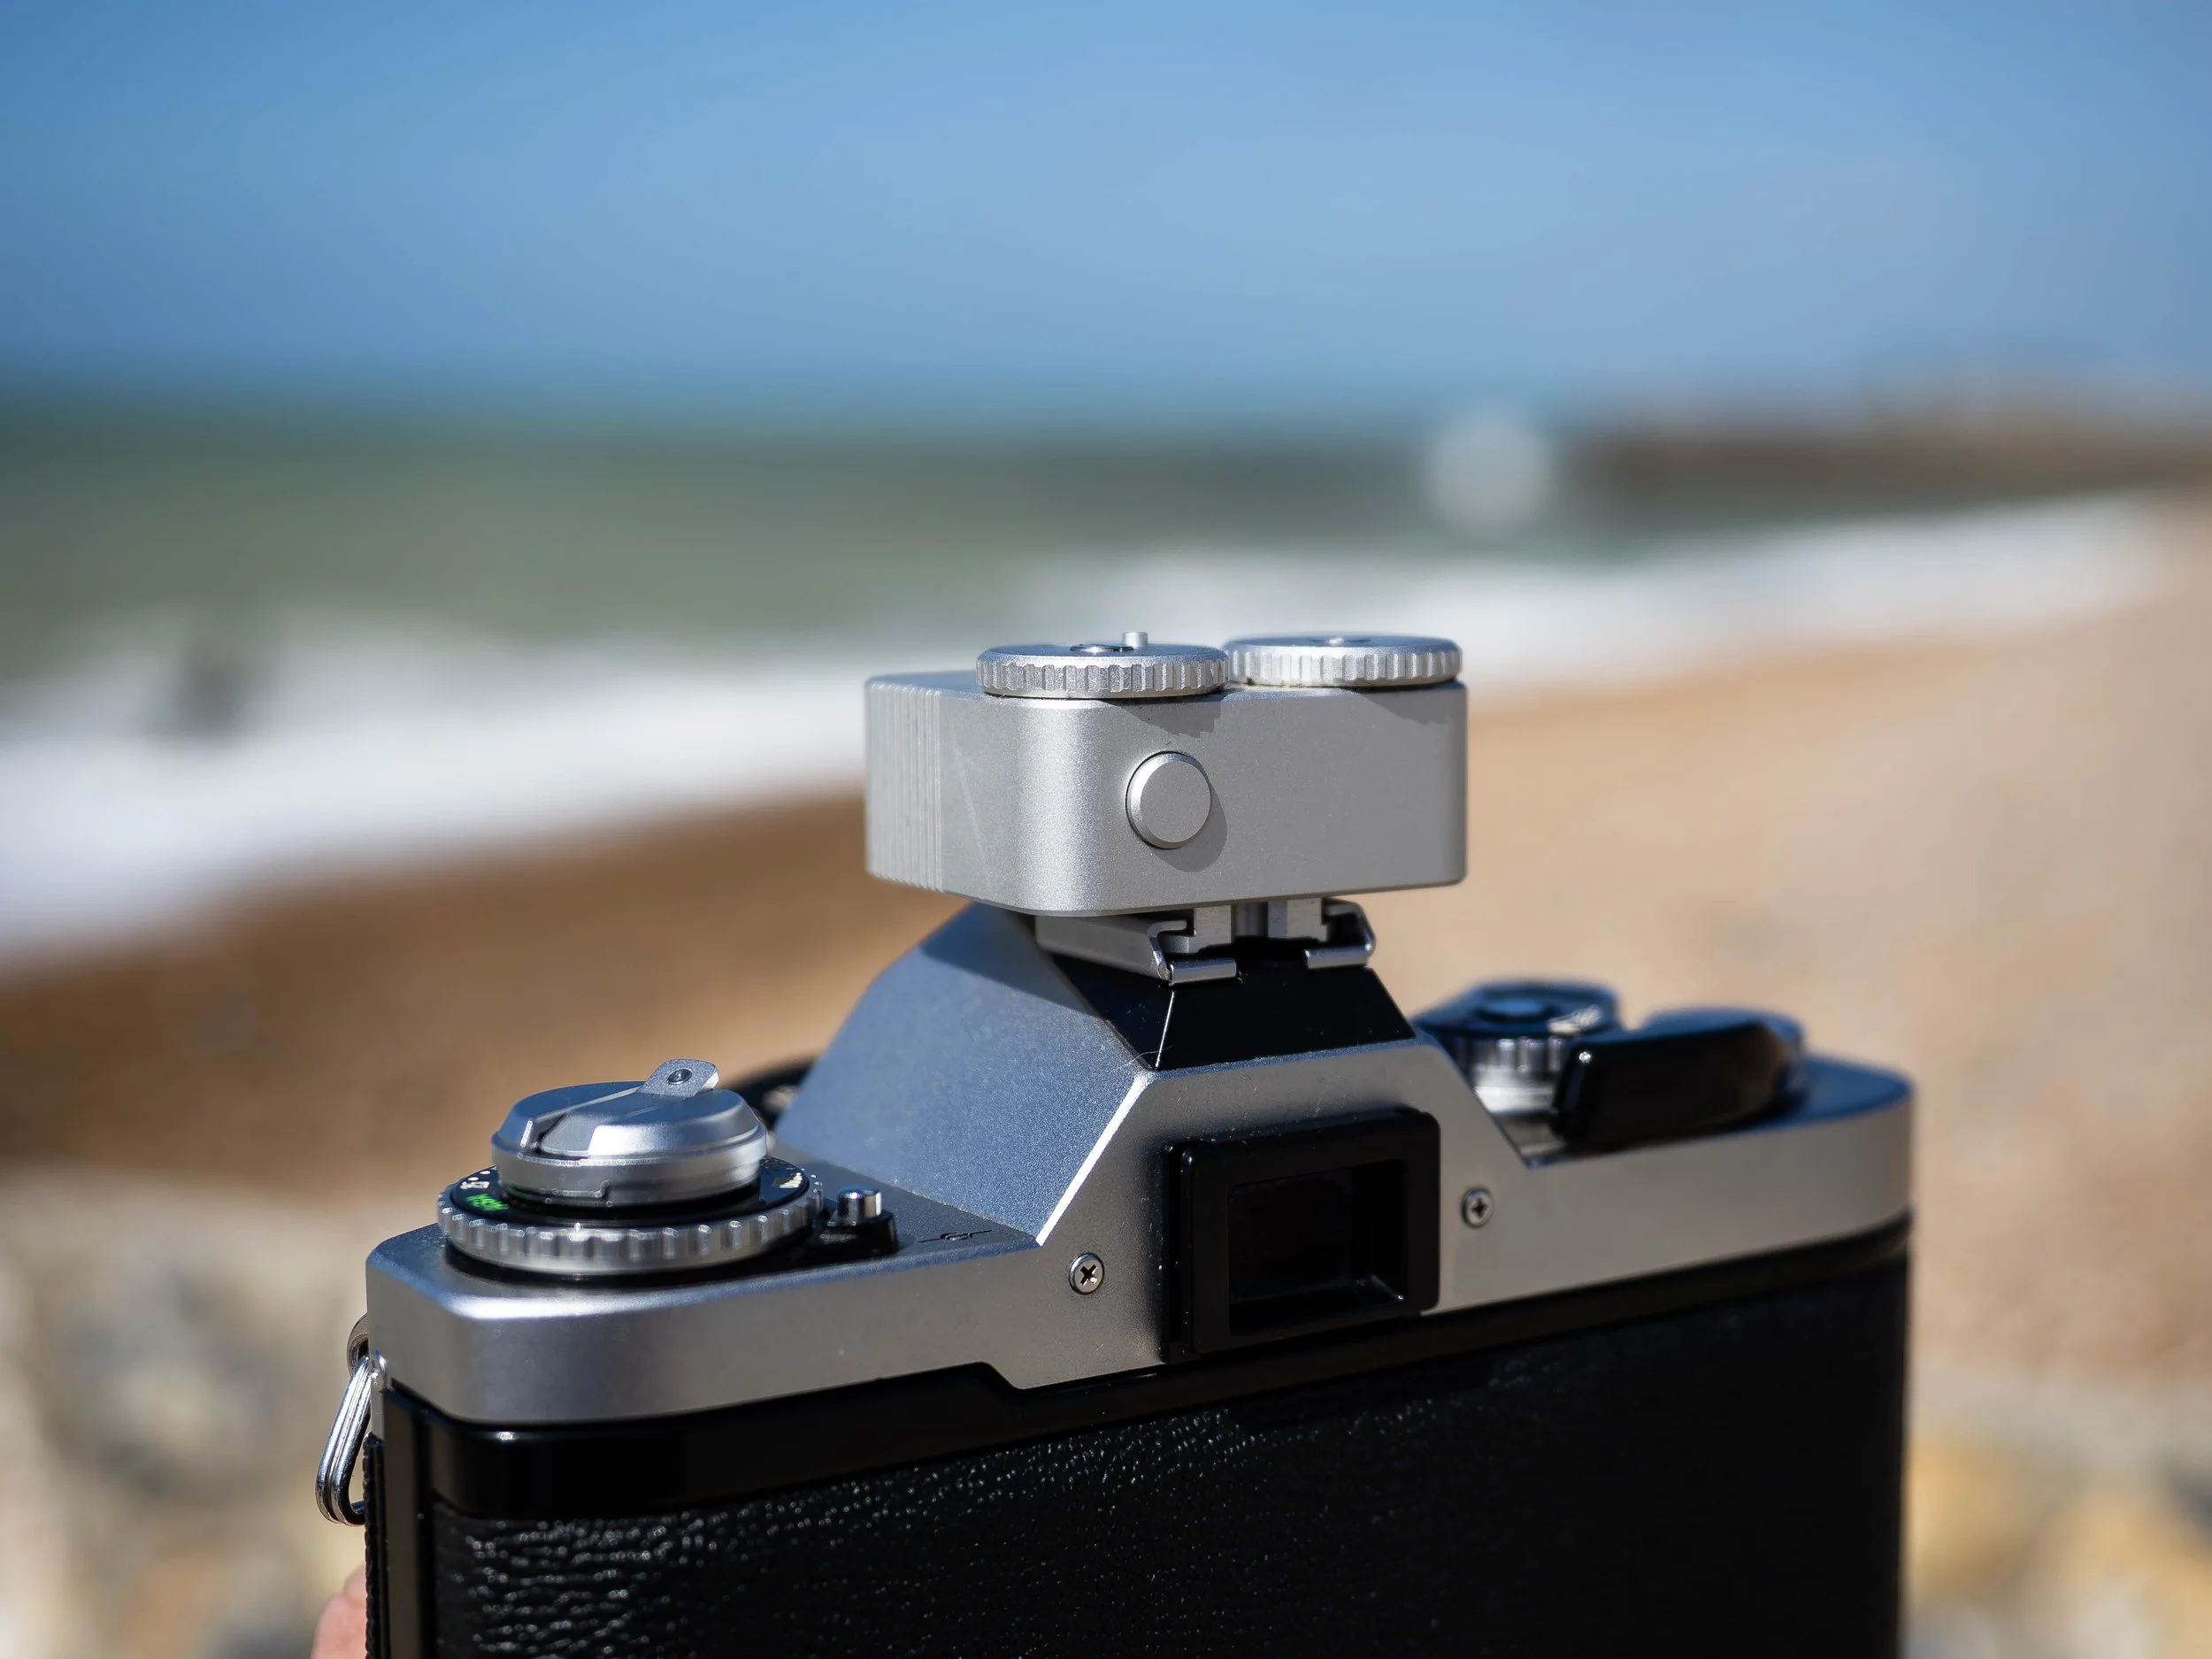
The Button On The Back Is The Exposure Button
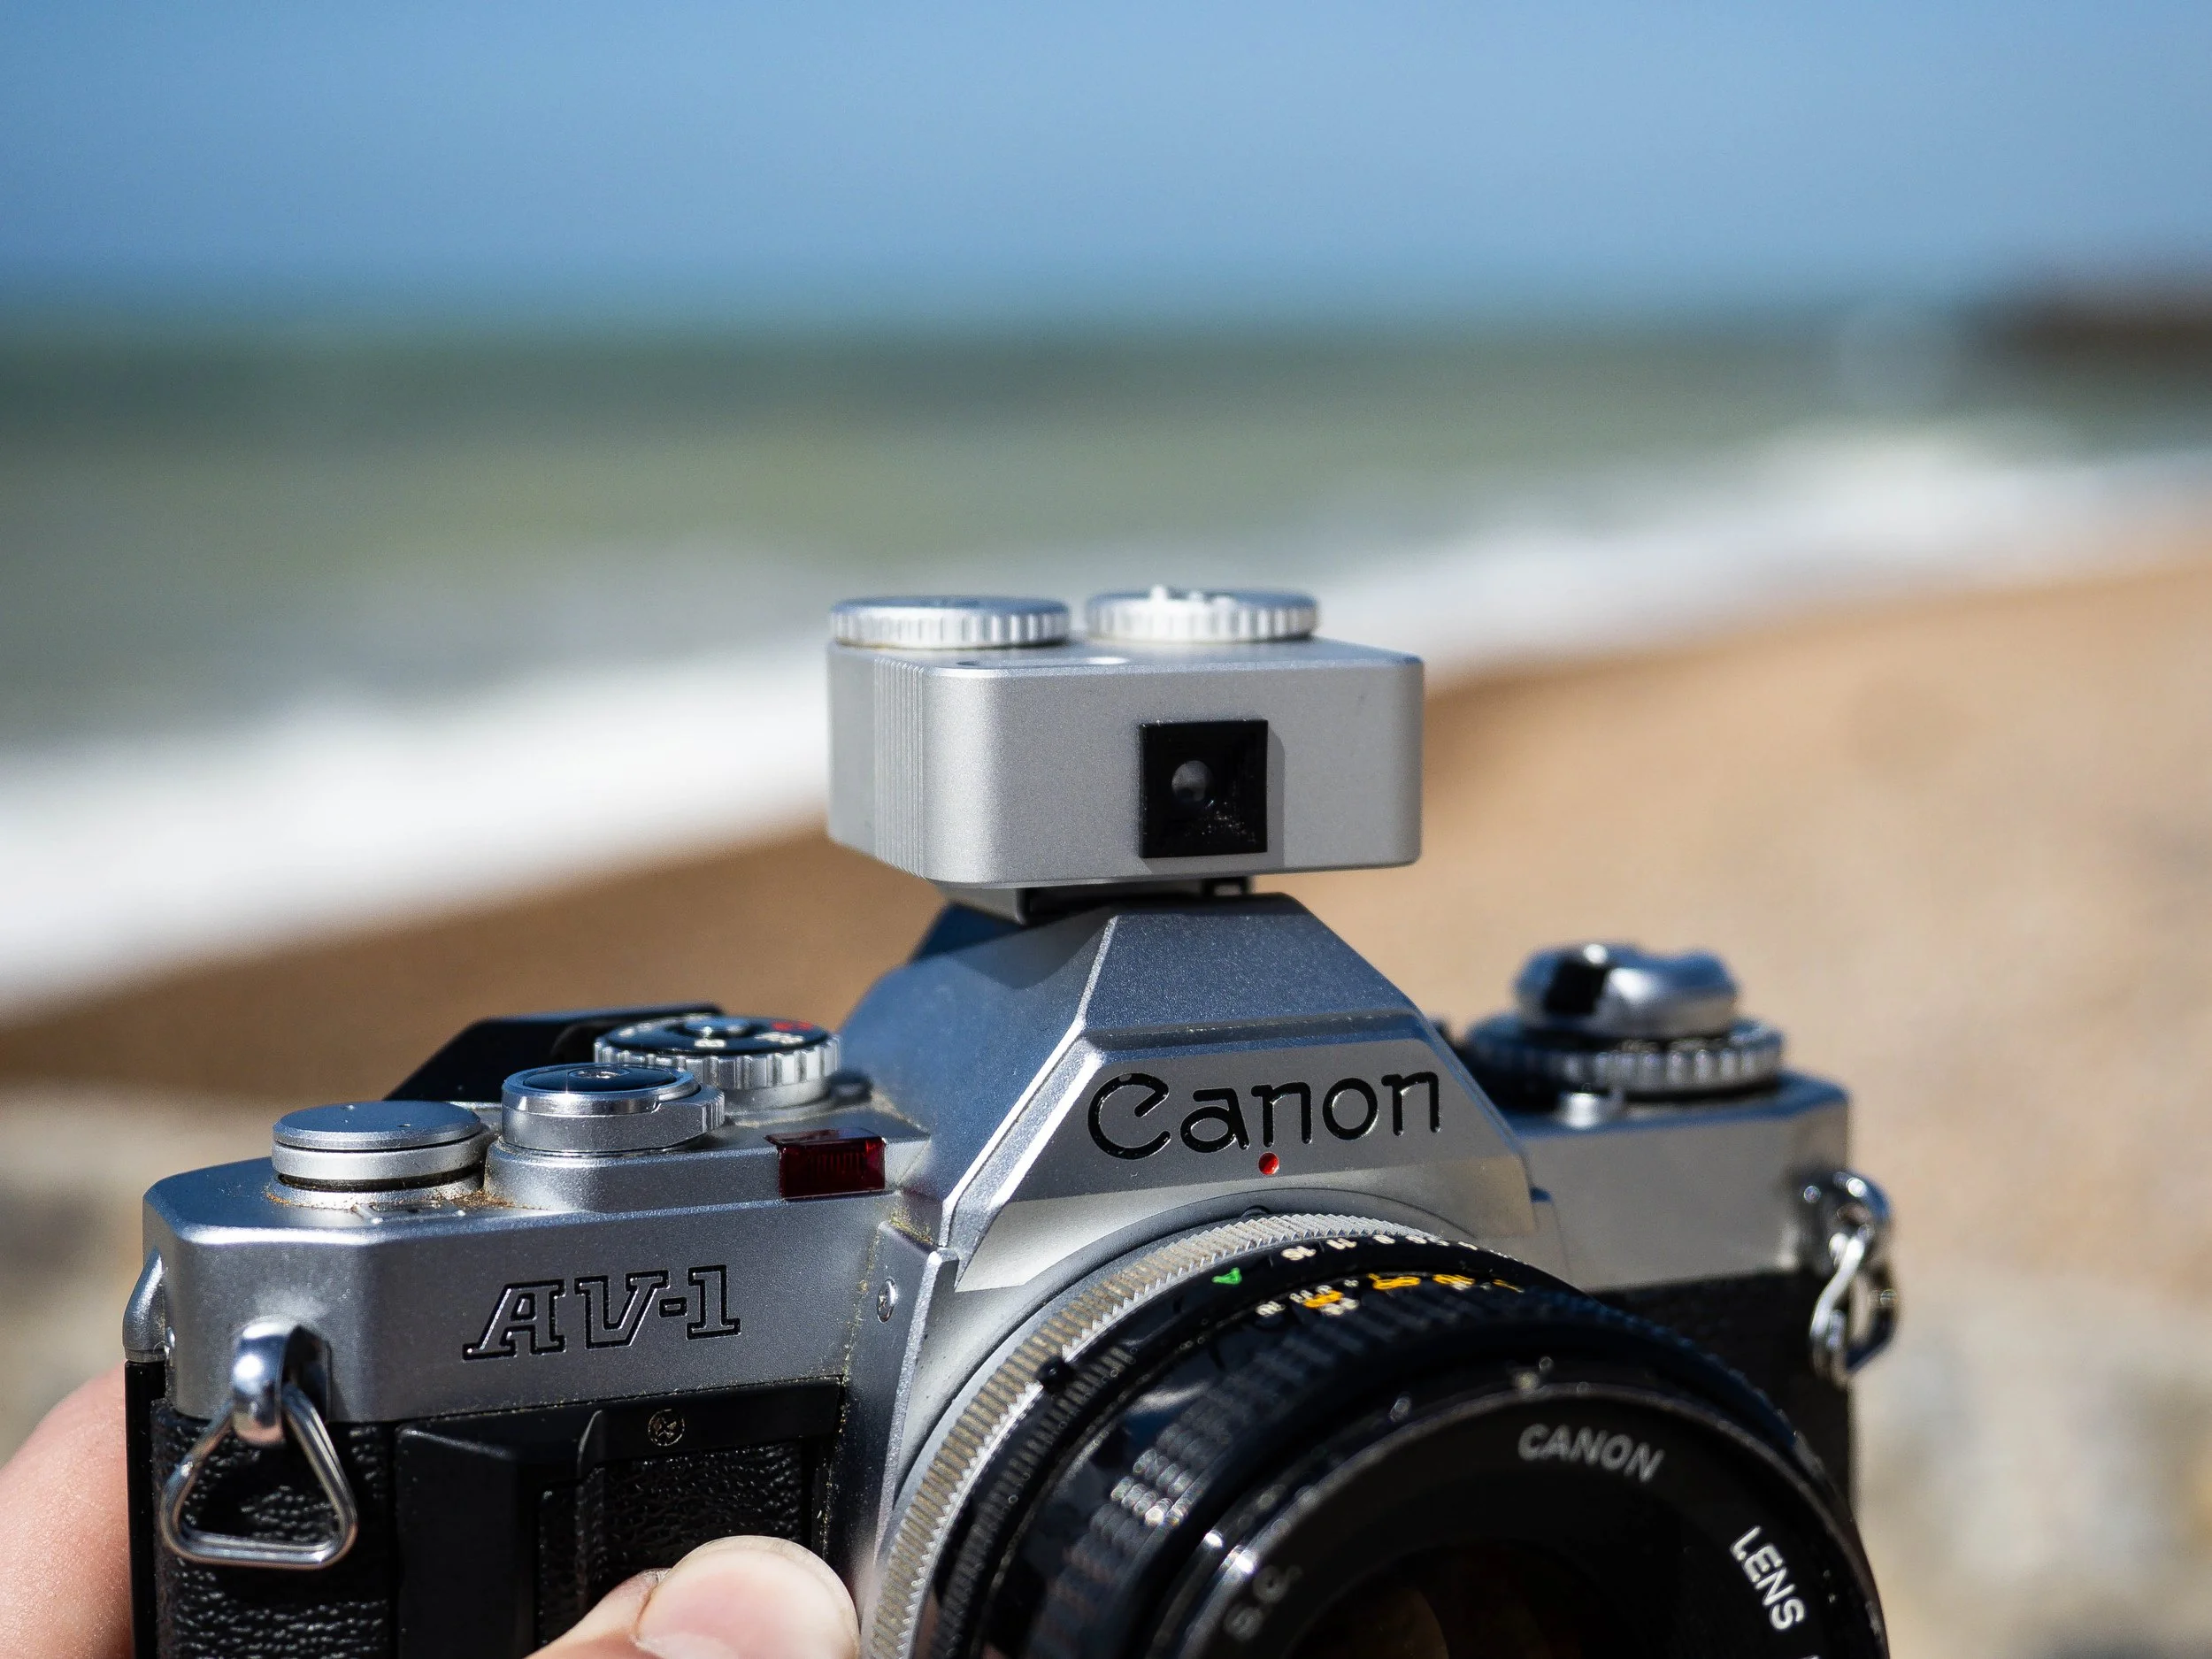
On The Front Of The Light Meter Is The Lens. Point This At The Object You Wish To Shoot
The issue with the LEDs being visible in daylight are my biggest problems with the light meter as it can be frustrating to use. However, the light meter is still a very functionally and cost effective little light meter. It feels tightly assembled and sturdy. The dials turn solidly and click nicely, it exposes correctly and it battery life is good. For those looking for a budget light meter that’s small and easily pocketable, then this light meter could be for you! I’m personally going to take a look at similar light meters that have a readable OLED readout that can be read from the back.